The beginning of the work
At the stage of the deployment of the batch, administrator and system application accounts are created using scripts, which can then be used to work with the batch. Pixel Admin settings and basic parameters are set using environment variables.
PixelAdmin Interface
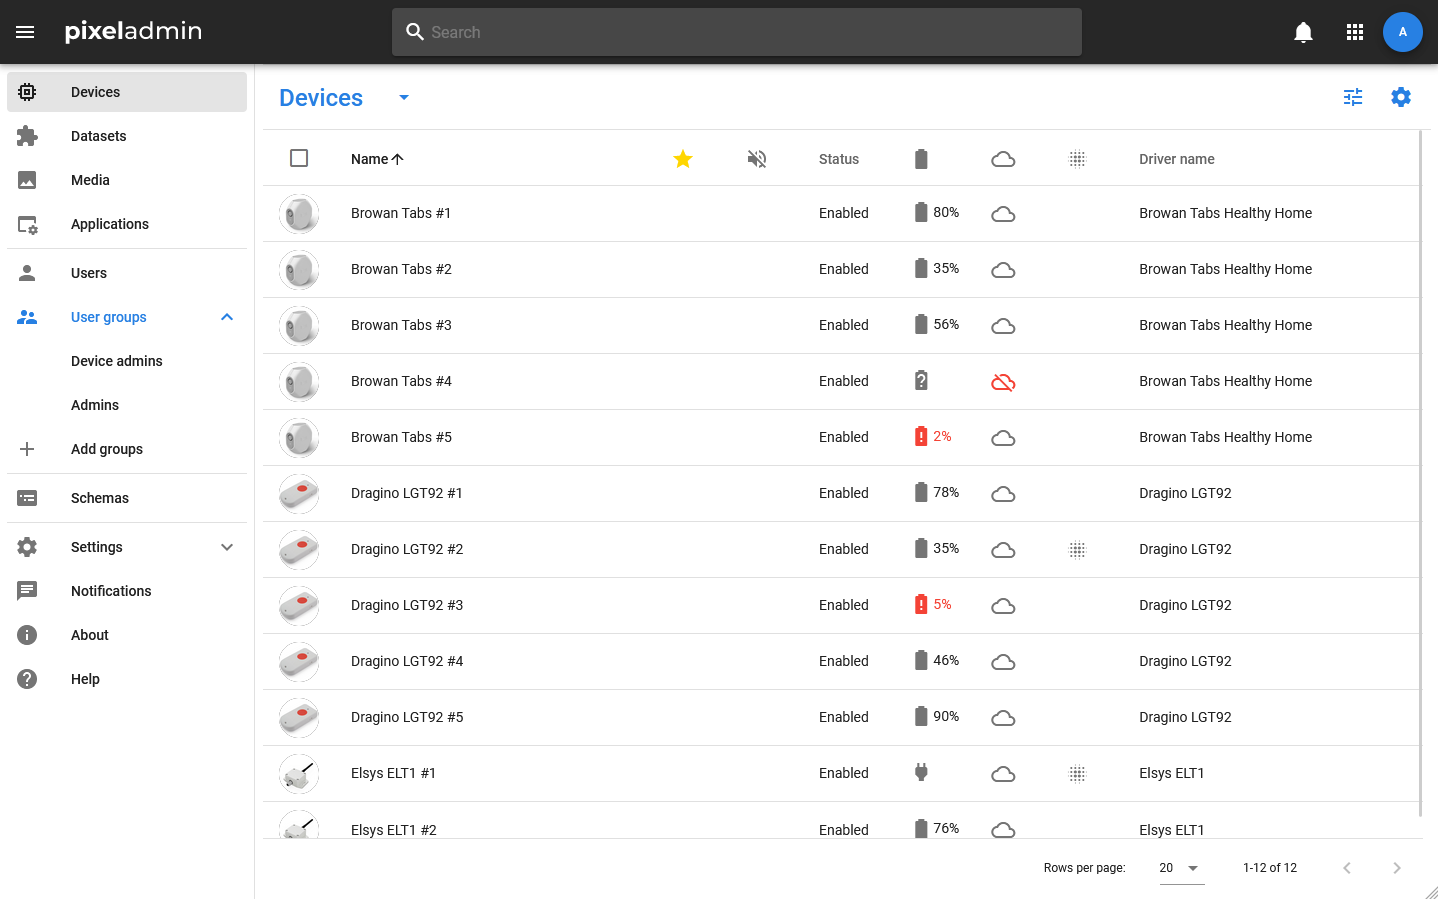
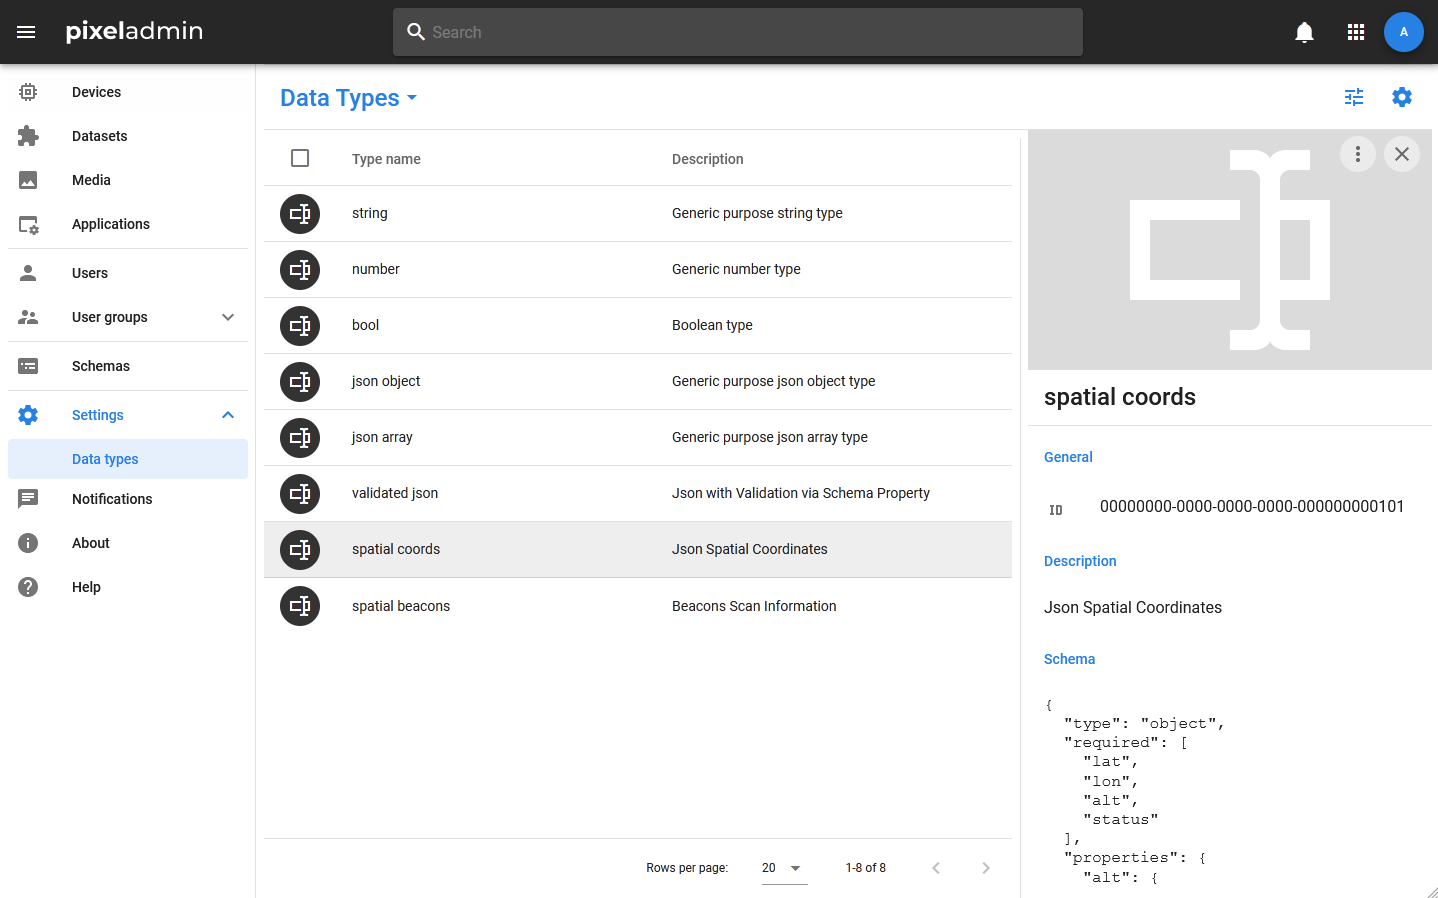
The PixelAdmin interface is based on a tabular way of displaying data. The category is selected through the menu on the left side of the window, which is opened and hidden by clicking on the standard menu icon in the main toolbar of the application. To manage the table, use the second toolbar located under the main one. Detailed information about the entities represented in the table rows is displayed in the card that appears on the right side of the window.
Functions such as sorting, filtering, and configuring the list of displayed columns are available for each table.
To add new items to the table, use the button located on the left side of the table toolbar: depending on the current category, the drop—down menu of the button will offer various options for adding (adding a new item, restoring, importing).
You can edit the contents of the rows only through the card or, in some cases, through the context menu of the group selection. Switching to group selection mode occurs when you click on the checkbox, which replaces the avatar when you hover over it in the desktop version and click on it in the mobile version. In this mode, you cannot add new elements to the table. Group operations are called via the table toolbar.
Navigation
You can navigate through the sections using the menu. It includes the following items:
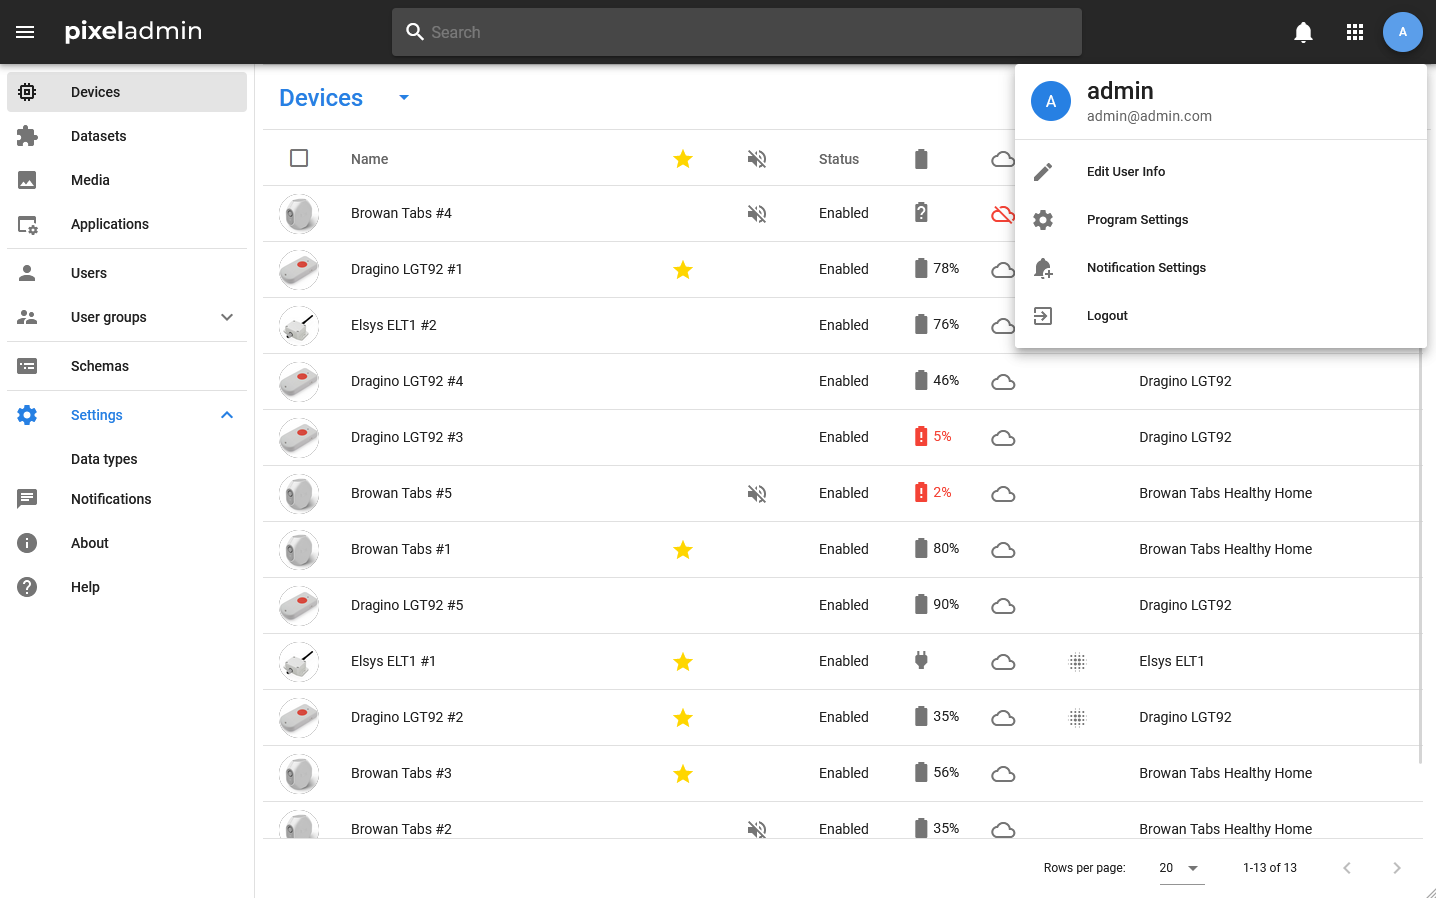
- Devices — devices, that is, objects created based on driver data schemas.
- Datasets — datasets, objects that are created on the basis of the data schema of the application.
- Media — media objects created based on the data schema of the media server and responsible for working with media files.
- Applications — objects that store information about the settings and status of applications.
- Users — accounts. These include both users—people (Persons) and users—applications (Apps).
- User groups — groups of accounts.
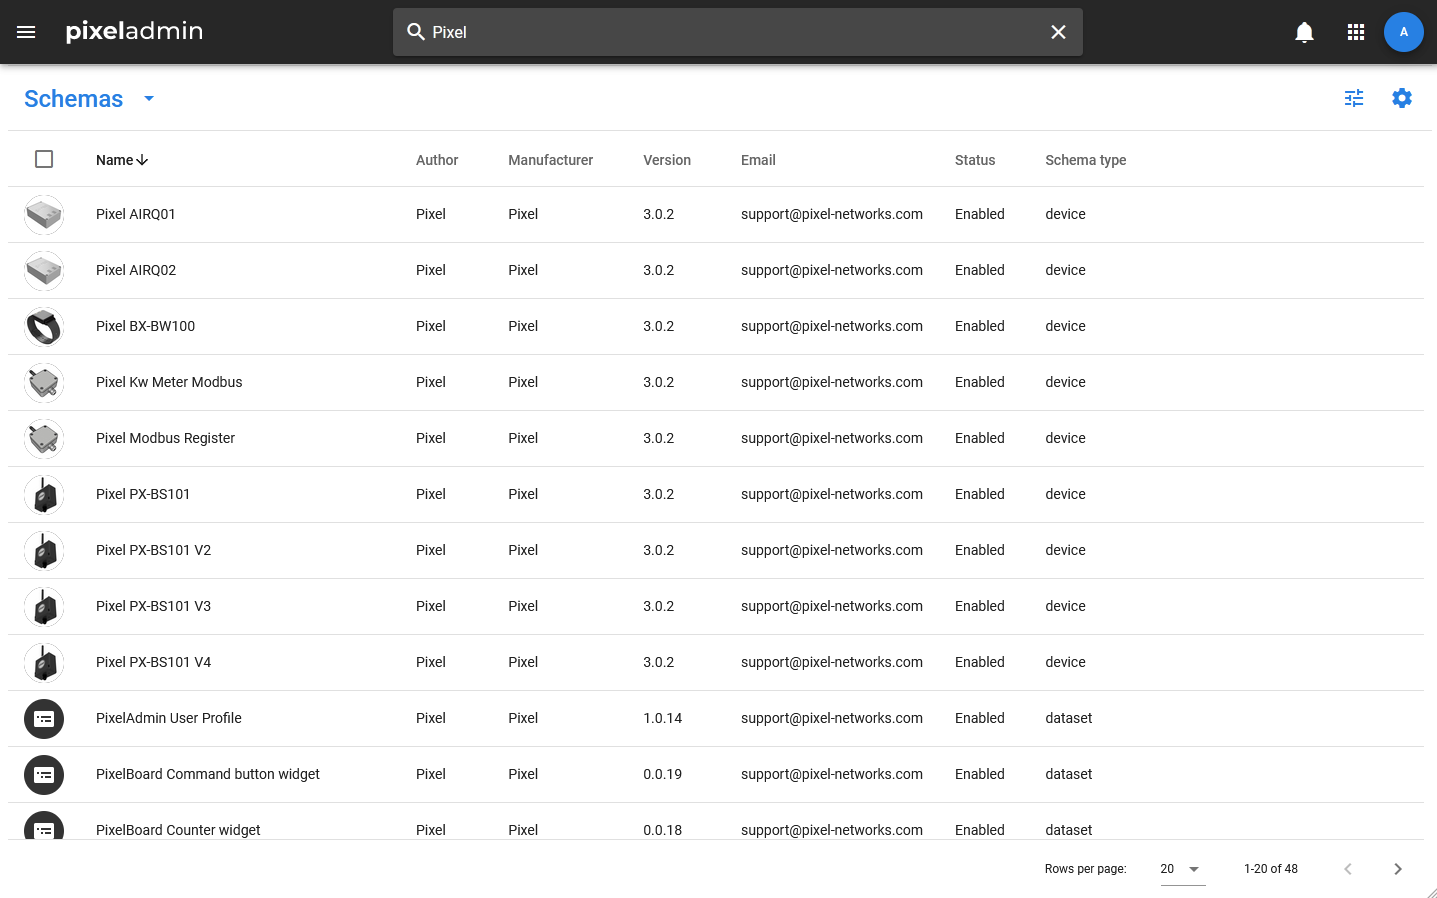
- Schemes — data schemas.
- Settings — global Pixel Admin settings.
- Notifications — section for viewing notifications.
- About — information about the program. Selecting this menu item opens a window that displays information about the current versions of Pixel Admin and appserver, as well as about Pixel—Networks.
- Help — contains a link to reference materials.
Tables
Basic information about the system elements, regardless of the selected section, is displayed in the table. Tables support sorting (in order to sort data by column, you need to click on its title) and pagination: at the bottom of the page there are buttons with which you can control the number of rows on the page and scroll through the pages. The total number of items is also displayed there.
Settings
Each table includes several mandatory and optional columns. Each user can enable and disable optional columns without affecting the work of other users. The table settings window is called when you click on the Settings icon in its toolbar.
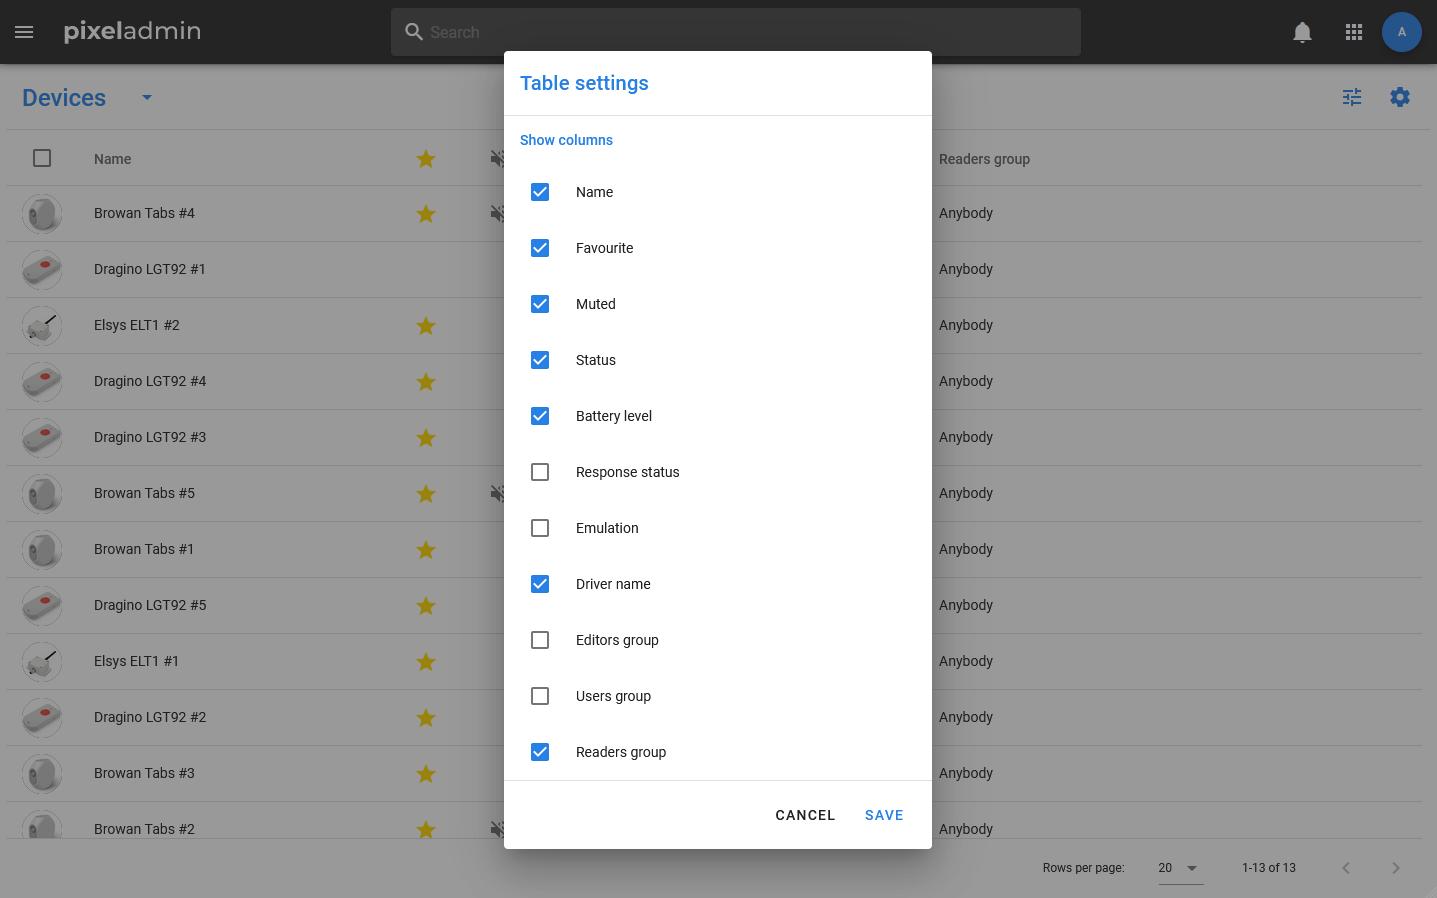
Columns marked with checkboxes will be displayed. Unchecked — will be hidden.
Filtering
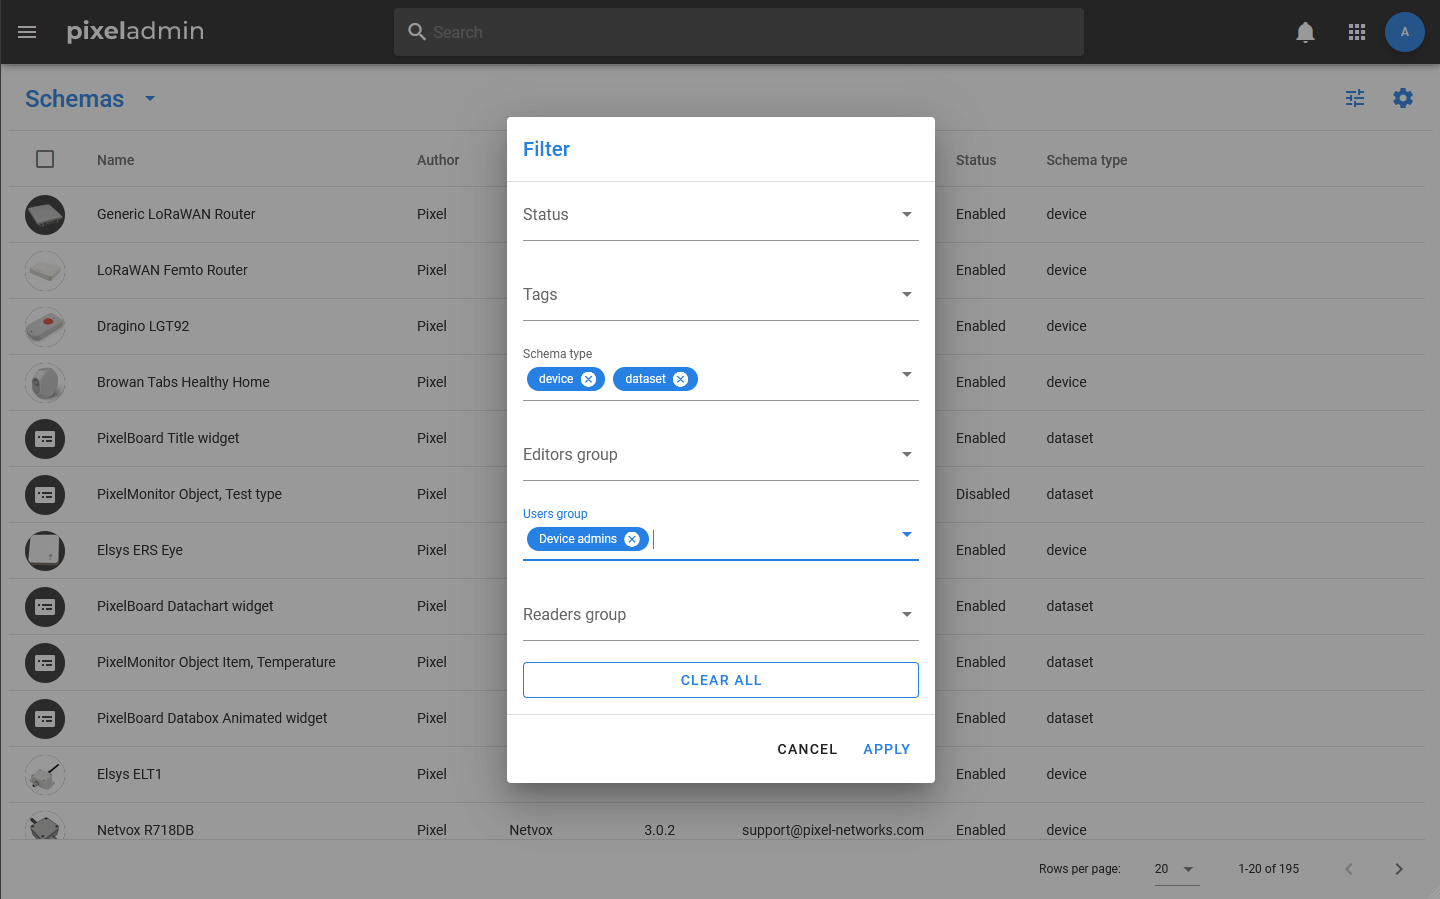
Filtering can be applied to all sections and allows you to leave only elements in the table that comply with certain rules. Rows in which objects do not meet the filtering conditions are hidden.
Filtering also does not affect the work of other users and the objects themselves.: this is solely the setting of the display of elements in the table for the current user.
The filter settings window is opened by clicking on the Equalizer icon in the table toolbar. Filtering is carried out according to the following principle:
- If the field is left empty, it is not taken into account when filtering.
- Values within a single field are combined using the logical operation OR. That is, if several values are specified in the field, the rows corresponding to any of them will be displayed in the table.
- Different fields are combined using a logical operation AND. That is, if a value is specified for one field and for the second, in order to get into the table, the object must match both of them.
Cards
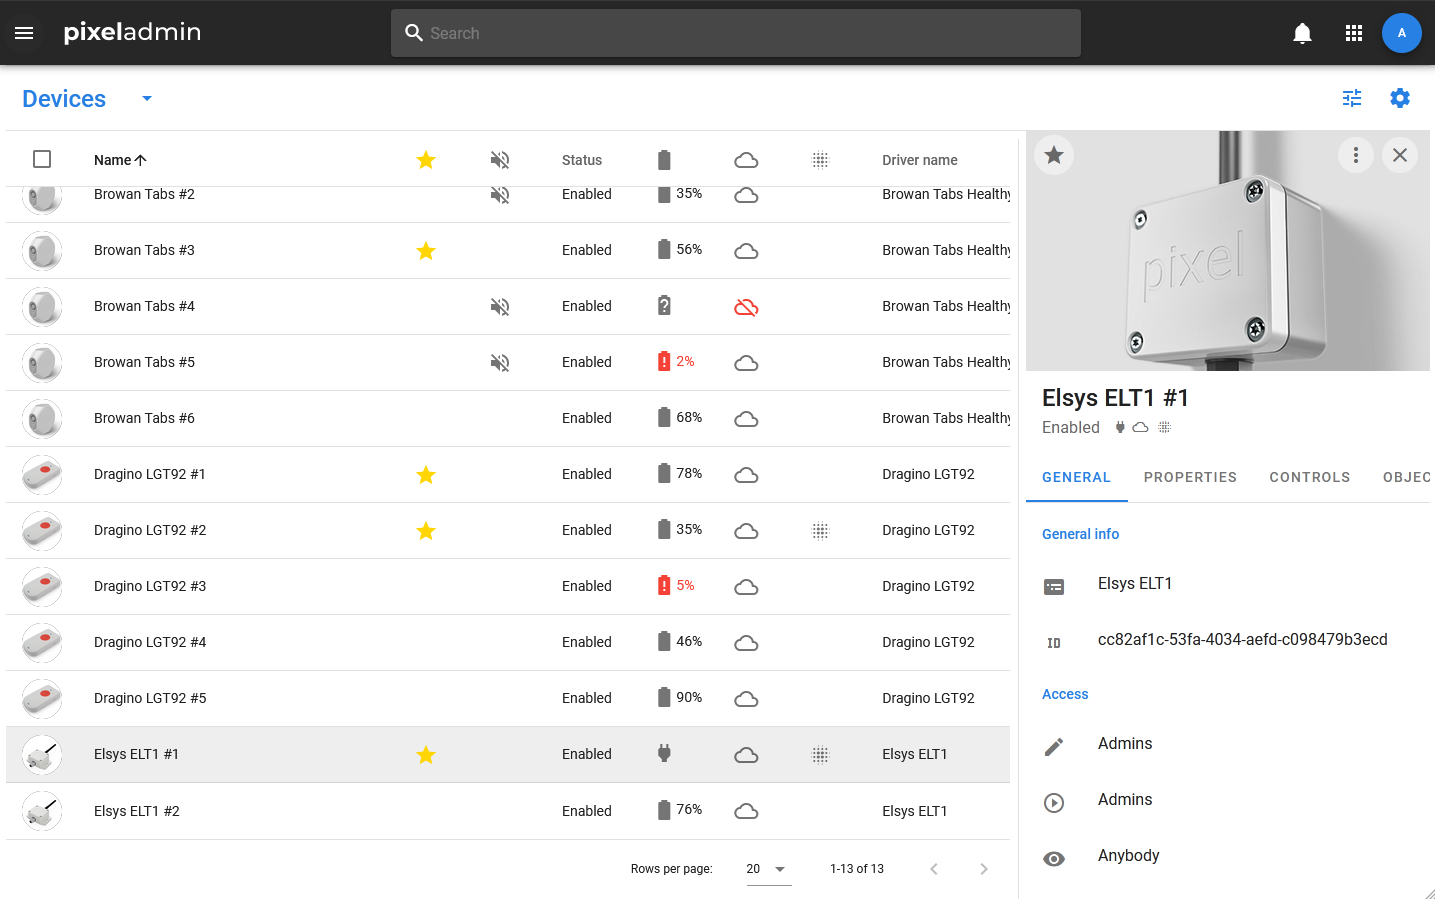
Regardless of the selected category, detailed information about the table item will be displayed in the card that appears on the right side of the screen. The card consists of a header that includes an entity image, an avatar, a name, a status or a set of statuses and a toolbar, as well as a set of tabs. The Access tab (access rights) is mandatory for most entities of entities.
The toolbar of the card includes the manage favorites button (filled in asterisk — delete from favorites, not filled in — add), the button to open the context menu and the button to close the card.
Search
The application implements a search by element names. To start the search, you need to start typing text into the search bar in the main toolbar of the application. The application first offers search results in the current section, then — search results for all sections. Clicking on the search result opens the card of the selected item. If it is not in the current section, then the transition to the desired section will be made.
In addition, the search can work as a filter by name. To use the filtering mode, you need to enter text in the search bar and, without clicking on the suggested search results, press Search or Enter. After that, only those elements whose names contain the string entered in the search will be displayed in the table.
Settings
The settings section includes sections that affect the operation of the entire portal or all users of the application.
Data types
In the Pixel Admin application, you can view, edit, create and delete the data types that Pixel Core works with and the applications that access it. The main types are set in the system when it is installed.
To add a new type, you must: 1. Select the menu item Settings > Data types 2. In the toolbar of the type table, select Data types > Add new 3. In the window that opens, specify the type name, description and its scheme in JSON format
Custom App Settings
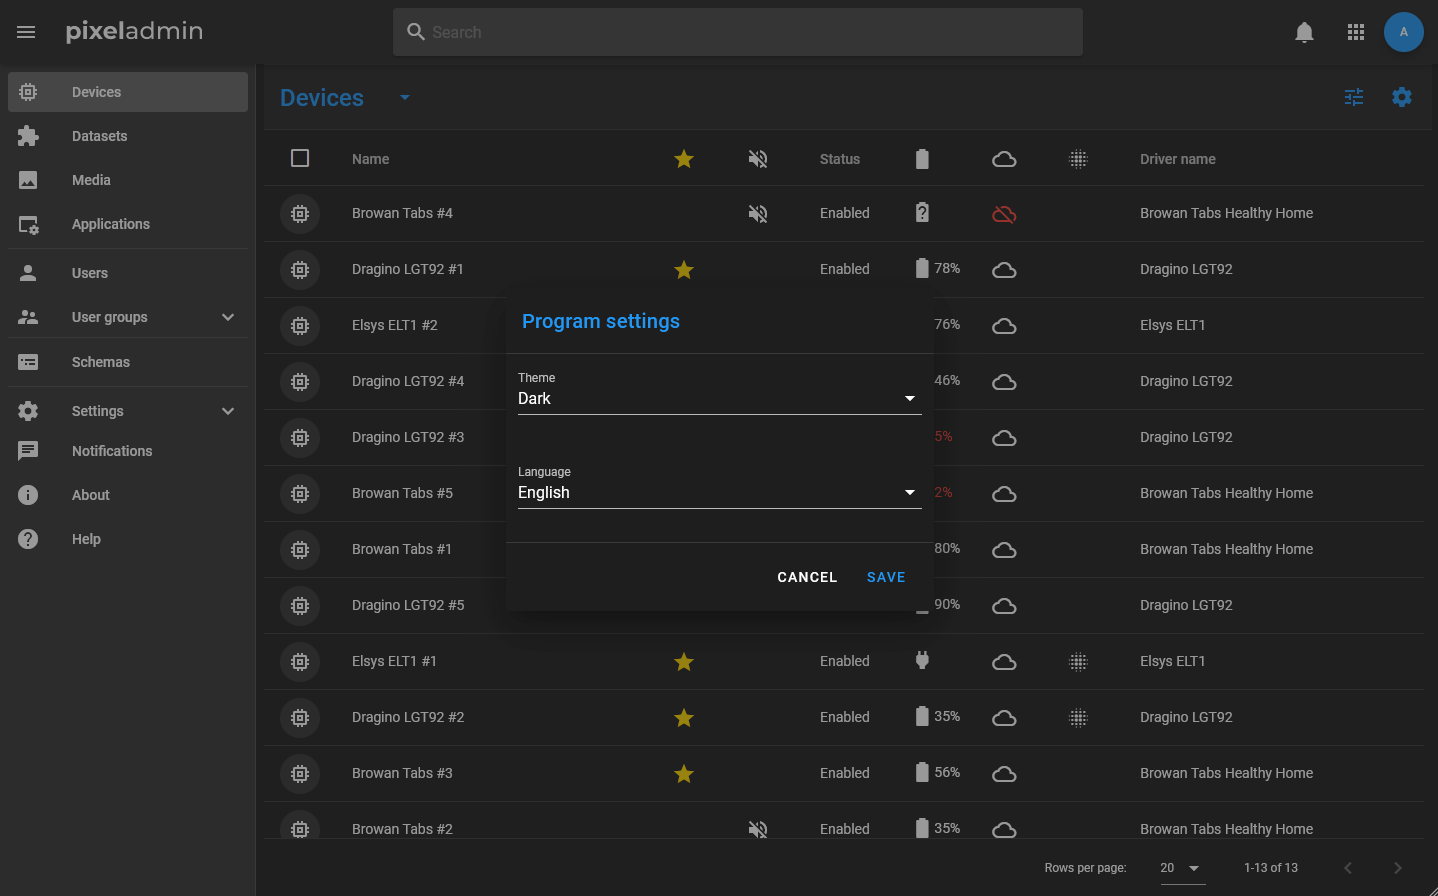
Custom settings are settings that are linked to the profile of a specific user and do not affect the operation of the application as a whole. These include settings for the appearance of tables (a list of displayed columns) and all settings related to notifications. Access to user settings is provided through the profile card of the current user, which opens by clicking on the avatar on the right side of the main toolbar of the application.
In addition, the user has the ability to configure and completely disable notifications, disable notifications from specific entities (Mute command), and create lists of selected entities that will be displayed at the top of the tables by default.
Managing Access Rights
In Pixel Admin, access rights can be set for an individual profile, data schema, object or preset, and for a group. In the first case, you can use the Change access context menu item of the card or group selection, or edit individual fields in the Access tab inside the card.
Access rights to groups are managed in the group editing window, which is called when you select the edit action button in the navigation menu.
When editing access rights, the editors group, users group, and readers group are selected. What rights a group has depends on what actions its members can perform with the entity. For readers, all actions for changing, creating and deleting entities are not available, for users — changing the values of fields and properties, creating and deleting. However, users have the ability to use methods (Controls). Editors have no restrictions and can perform any actions provided by the system with entities.