Plans
Plans are PixelMonitor service objects that allow you to display various images saved using media objects on top of the map.
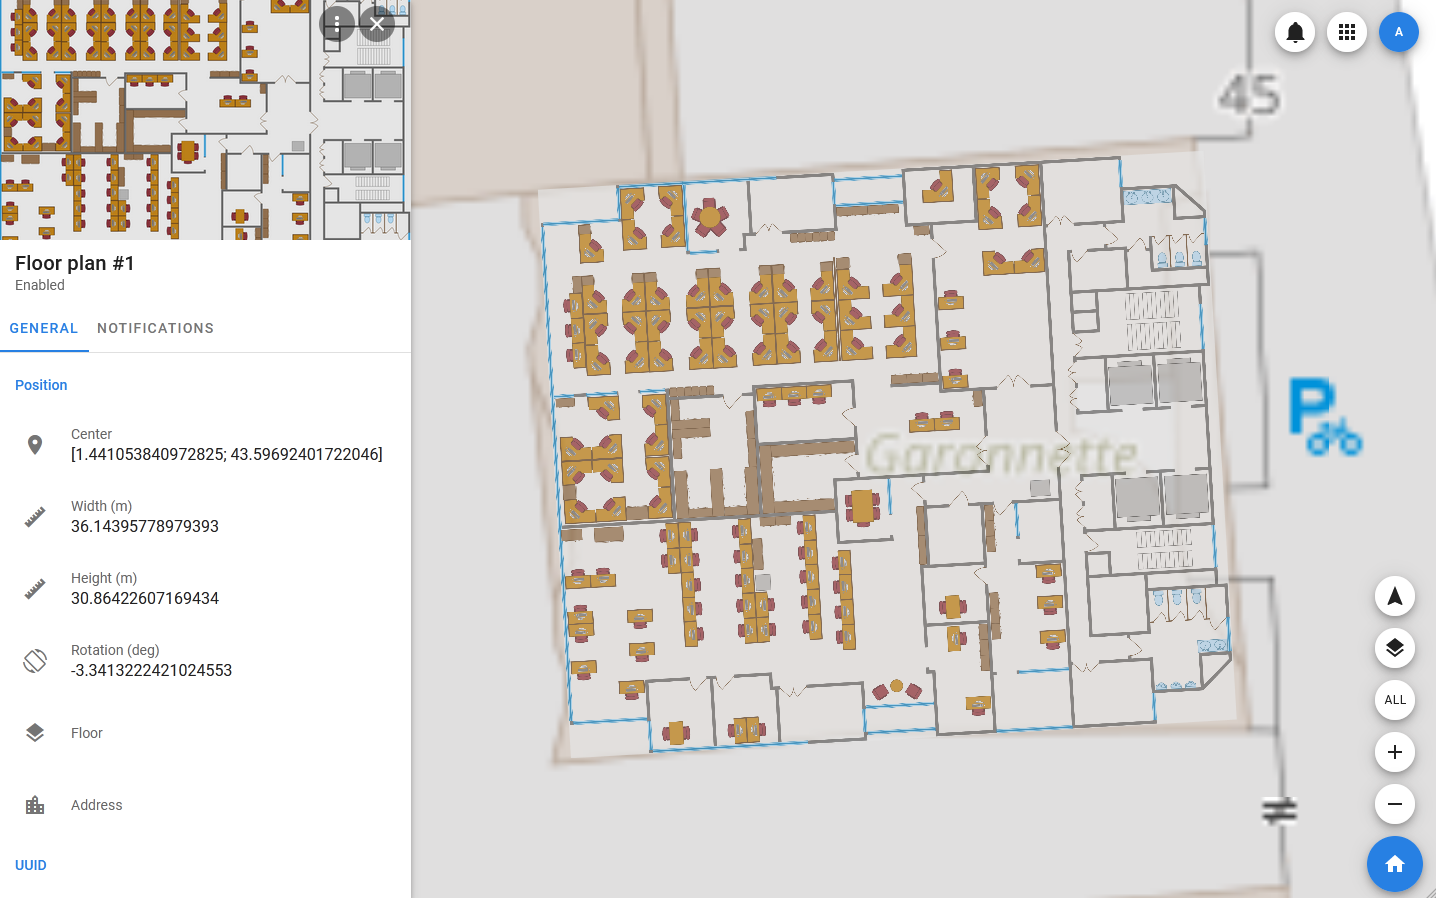
Viewing Plans
The full list of plans that exist in the system can be seen by selecting Settings > Plans in the main navigation menu.
When you select a plan in the list, its card opens, which contains all the basic information about the plan, as well as additional information such as a description and photos. In addition to the main image (which is the plan), various media can be linked to the plan, which will help users better navigate indoors or on the ground.
To control the display of plans on the map, there is a button in the lower right corner of the screen with the image of layers: by clicking on it, you can select the map to be displayed (or disable the map altogether) and one or more plans that are located on the current geotag. The list of available plans will vary depending on the selected geotag.

Creating and editing plans
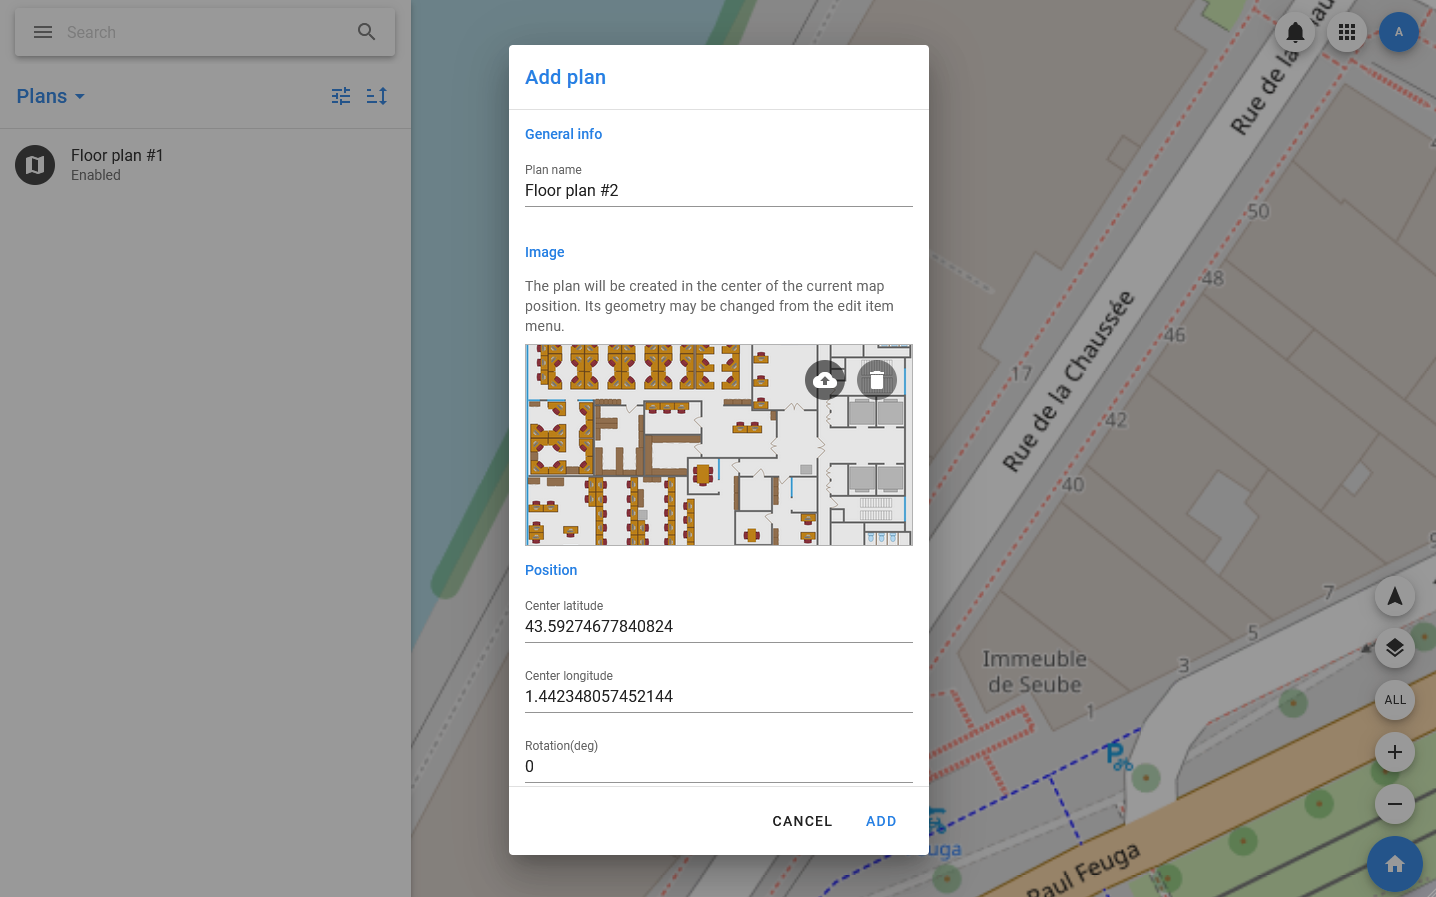
Creating a plan
To add a plan, you must:
- Open the side menu.
- Select Settings > Plans.
- In the toolbar of the list of plans, select Plans > Add new.
- In the modal window that opens, specify the name of the plan, select the desired image (the file system dialog opens), if necessary, specify the width and height in meters and the rotation angle (if they are not exactly known, they can be changed in visual mode), and a description.
- Click Add.
Important
If the coordinates of the plan are not set manually during creation, the new plan is created with the center at the point that is the center of the map display at the time of its creation. To create a plan for a specific location, you need to position the map so that it is in the center of the screen.
It is also possible to change the Enable / Disable status for the plan. If the plan gets the Disable status, it is no longer displayed on the map.
Change basic information about the plan
To change the basic information about the plan, you need to:
- Open the side menu.
- Select Settings > Plans.
- Select the desired plan from the list and select Edit in its context menu.
- Make the necessary changes in the modal window that opens.
- Click Save.
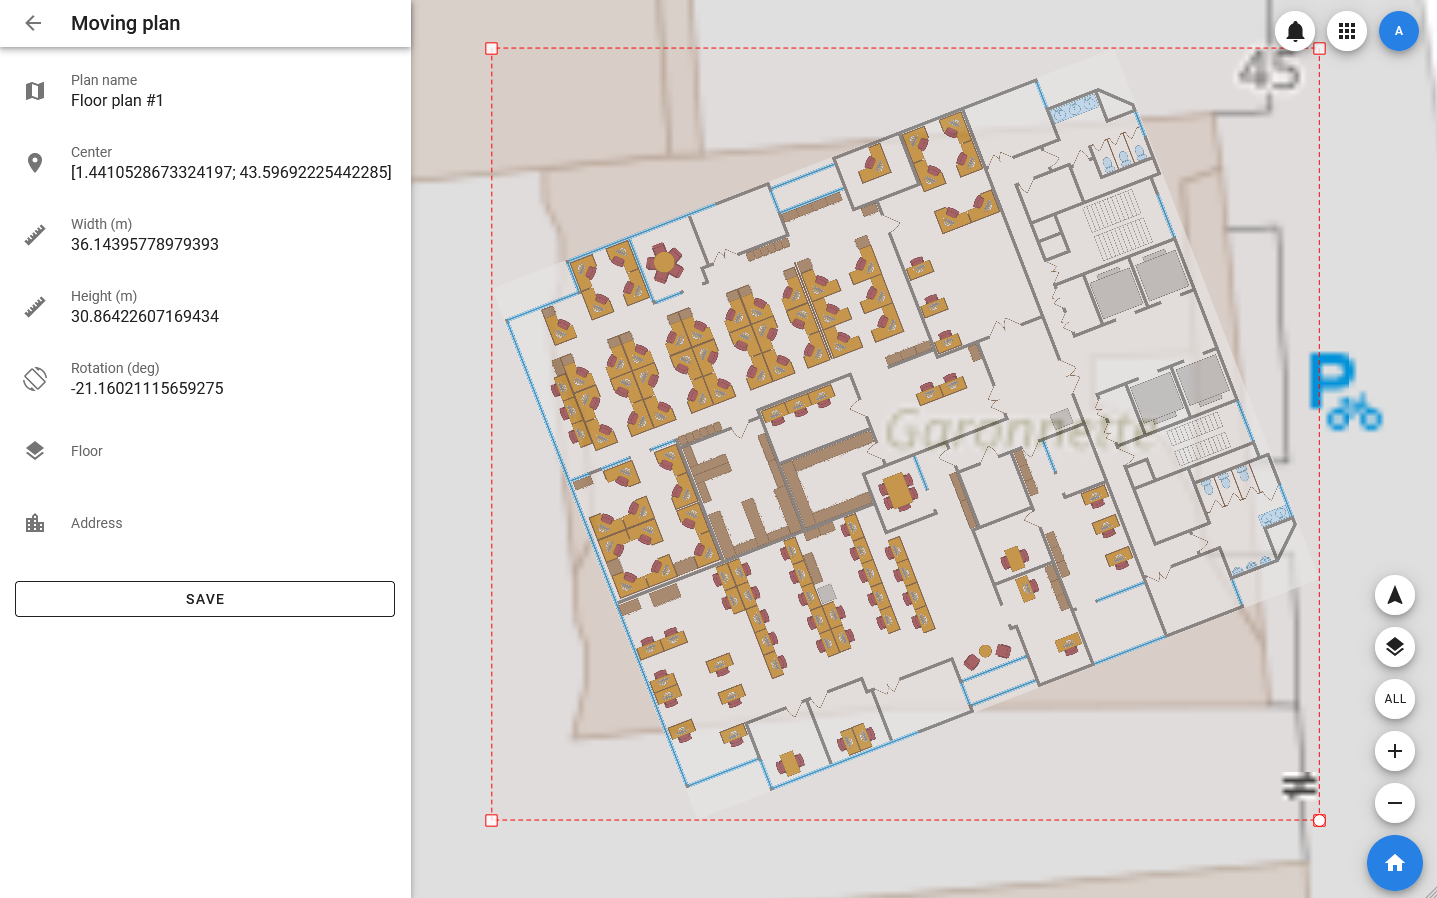
Changing the shape and position of the plan
The loaded plan can be scaled with the same proportions and rotated in visual mode: this allows you to position it on the map so that the position of the plan corresponds to the actual position of the objects.
To change the shape and position of the plan, you must:
- Open the side menu.
- Select Settings > Plans.
- In the list of plans, select a plan and select Move in its context menu. After that, the app will switch to visual editing mode.
- To move the plan — move the cursor to the middle of it and move it by holding down the left mouse button.
- To change the scale of the plan-pull its corner (the corners are marked with dots). To change the rotation, select a point above the middle of the top face of the plan and rotate the plan with the mouse.
- To save the changes, click the SAVE button in the plan card.
It is also possible to exit the move mode without saving changes — to do this, click on the arrow at the top of the card and confirm the action.